Basics about WM2MAIL
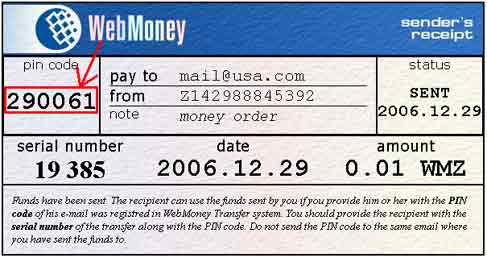
It is easy to use the WM2MAIL service. All you need is to create a check and send the
check attributes (its number and pin code) to the recipient's email address.
Below is a step-by-step guide for creating, emailing and using WM2MAIL checks.
Creating a check
- You start working with the service by launching the WM Keeper Classic.
- Select Purses – Send WM – To email from the main menu or right click on the needed purse and select Send WM – To email from the pop-up menu.
- Enter the recipient's email address, the amount, type a message you wish to send and click Send
- If the recipient is not registered with WebMoney Transfer, the pin code needed for receiving the allotted funds can be given to him via telephone, fax or another email.

You can find the payment and check its status (sent/received/accepted) in the history of email payments at any time.
Receiving a check
There are two ways to receive checks. Let’s look at each in detail.
- You have received a check to the email you provided during the registration with
WebMoney (i.e. the email associated with your WM-ID). In this case, you can exchange
the check for WebMoney units and transfer them to your WM purse. You can collect the funds
by clicking the first link in the email, authorizing your WM-ID on the website you will be
redirected to and clicking (Accept).
- If you are new to WebMoney Transfer or you have received a check to your email that
is not associated with your WM-ID, you can join the WebMoney Transfer system and provide this
email in the process of registration or you should change the WebMoney registration email in your
personal WM-ID details. Then, you can collect the funds by clicking the first link in the email.
In addition, you can forward the check to another email address by clicking the second link in the email. You will have to enter the check serial number (it is written on the received check) and pin code (that you should receive from the sender). Upon forwarding the check, you can no longer use it.